
All things sweet
Louise's Lemon Meringue Pie
 Lemon Meringue pie is a family favourite and something I only mastered later in life. This version comes from South Africa and incorporates condensed milk, so the filling has more of a cheesecake look about it than the traditional curd variety we make in the UK. The meringue should be soft and fluffy after baking not a crisp shell. It is simple to assemble and tastes great. In terms of egg usage, if you make extra rich pastry you use an additional egg yolk, the pie itself uses 3 eggs. It can be made gluten free using our gluten free pastry recipe
Link to measurement conversion chart
Serves 6 – 12, depending on how generous you are!
Ingredients
- 1 batch of extra rich short crust pastry or 1 pack of ready made
- 3 eggs separated
- 1 x 250g tin of sweetened condensed milk
- The grated rind and juice of 3 lemons
- 5 tbsp caster sugar
- A little icing sugar to dust
You will also need
- 1 x 20cm diameter loose bottom baking dish or pie dish
- a large mixing bowl
- a hand or electric whisk
Method
- Line the baking tin or pie dish with pastry and blind bake at 190c for 15 – 20 mins. Remove from the oven and allow to cool
- Reduce the oven temperature to 180c
- Beat the egg yolks, lemon juice and rind together in a bowl until combined.
- Add the condensed milk and whisk until thick and creamy, pour into the pastry case
- In a clean bowl whisk the egg whites until peaks form. Gradually add the sugar 1 tbsp at a time until combine and the meringue looks thick and glossy
- Carfully spoon the meringue over the lemon mix and make peaks in the surface using the back of a spoon
- Bake for 25 mins
- Dust with icing sugar and eat warm or cold


Serving suggestions, hints and tips
- This dessert is great served with cream, ice cream or Greek yogurt but if you don’t do dairy it is also fab on it’s own
- Try orange or lime versions. Use 2 oranges if they are large
- Extra rich pastry has a shortbread texture to it due to the fat content, however if you want less fat then normal shortcrust will do
- If you want to warm it through don’t use the microwave, just pop it in a warm oven for 10 mins
- If you don’t own a sugar shaker use a sieve or tea strainer to sprinkle the sugar over
- Best eaten the same day but will keep for a couple of days in an airtight tin
- Make it gluten free by using gluten free pastry.
- We think this filling is similar to a cheesecake texture. We like to make a biscuit base instead of pastry for it. Use 300g Digestive biscuits crumbed and 100g Butter melted, mix them together, line the base and sides of your tin with it then continue the recipe from step 2.


Acknowledgements
This recipe was given to me by a very good friend Louise, who originates from South Africa and loves lemon meringue pie. However, when she tried our version, she really didn’t like it. She found it lacked the richness she was used to. Lou has shared many of her favourite foods from home with us and gave this recipe to me after she made it for a girly night in, and we lurved it. It is now our family favourite version of the classic too. Thanks Lou!
If you have enjoyed this recipe then why not try these from our collection:
- Easy to put together and a tasty snack have a go at a Fried Egg Sandwich for a change and add a little of our Tasty Tomato Sauce instead of ketchup.
- Looking for something a little more substantial then you can't beat a Salad Nicoise and it's a healthy option too
- Got a few egg yolks to spare then have a go at Pateis De Nata, or Portugese Custard Tarts, totally tasty!


We hope you have enjoyed these recipes
Happy eating!
Alex's Chocolate Brownies
 A proper Chocolate Brownie should have a fudgy texture rather than the solid cakey brownies you tend to find in the supermarket and high street coffee shops. They also tend to improve with time so if you can resist the cake tin for a day or two, all the better. As these browies are fudgy it is very important that they be allowed to set in the tin before you turn them out otherwise you will end up with liquid brownie all over your work surfaces, something Simon discovered the hard way when he made brownies for his catering exam!
Link to measurement conversion chart
Ingredients
- 250g Plain chocolate, min 70% cocoa solids, broken into pieces
- 250g butter
- 350g caster sugar
- 4 eggs
- 150g plain flour
- Optional 150g your favourite nuts chopped roughly, Pecan or Hazel nuts work very well
You will also need
- 1 deep brownie tin or baking tray - size approx. 23 x 23 cm, lined with baking parchment
- a heat prrof bowl
- a mixing bowl
- a hand or electirc whisk
Method
- Pre heat the oven to 180c
- Melt the chocolate in a heat proof bowl over a saucepan of water, or in a microwavable bowl and microwave – take care not to overheat if doing in the microwave.
- Add the butter to the chocolate and stir until melted
- In a separate bowl whisk the eggs and sugar together until frothy then stir in the cooling chocolate.
- Fold in the flour
- Pour into a lined baking tray and bake for 40 – 45 mins
- Remove from the oven and leave to cool in the tin
- Cut up into even squares
- Eat and enjoy!


Serving suggestions and variations
- Add dried fruit, approx. 150g, instead of nuts
- For a more cakey finish use self raising flour instead of plain flour
- If you don’t have chocolate with 70% cocoa solids other plain chocolate will do and give a slightly less rich brownie
- A cooked brownie will start to melt in the middle if warmed in the microwave for 20 seconds, nice served with Ice cream or you can break your warm brownie into chunks and make it into an ice cream sundae with chocolate sauce drizzled over
- If you want to go really OTT on chocolate pour melted chocolate, mixed with either with a little butter or cream, over the top of your brownies before you remove them from the pan
- Warmed brownies served with icecream are just something else!
- Will successfully volume up to a 6 egg mix, use a lined roasting tin instead of a brownie pan.
- Be creative in how you present your brownies, try adding a topping. I spotted these beauties at the Malvern Spring Show in 2016, supplied by The Chock Shop.


Acknowledgements
This recipe was passed on to me by my colleague Alex, who makes these all the time for her children. They keep about 12 chickens and consequently get an amazing quantity of eggs to use up. Well done Alex and thanks for the taste testing boys.
If you have enjoyed this recipe and have some photo's to share we would love to hear from you, or you can post photo's on our Facebook page.
You might also like to try one of the following from our collection;
- Not just for breakfast, I was reminded recently of eggs for supper when I saw boiled eggs and soldiers on our local pub's childrens menu!
- Fancy having a go at something a little more adventurous, well try our carrot and almond chutney, can be made any time of year so don't wait till Autumn.
- For a simple and tasty salad accompaniment why not try onion and tomato salad, yummy.


Happy eating!
Traditional Cream Tea
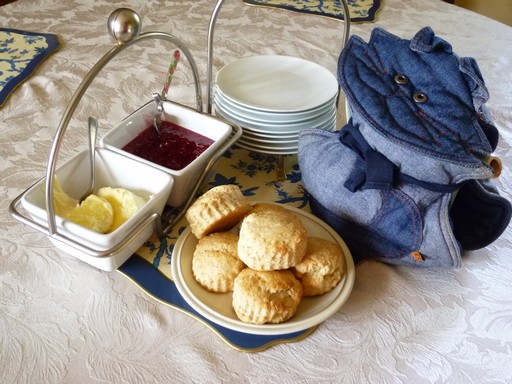 Scones with jam and clotted cream is a family favourite at any time of year. Fortunately we don't make scones very often so it is a treat and normally driven by an urge from Simon, who is the scone maker in our house. Serving scones with homemade jam makes them extra special, we prefer raspberry to the traditional strawberry. Making your own jam is never going to be cheaper than buying something from the supermarket, however the cost is more than matched by the improved flavour and the joy of making it. You can make jam in small quantities as well as large so don't think you have to commit to making a vast amount. Small amounts of fresh jam can be kept in a covered glass container in the fridge until you've used it all up.
Link to measurement conversion chart
This recipe makes 6 – 8 scones and enough jam to have a little over. If you need more than 8 scones double the mixture and make 12 – 16, do not be tempted to squeeze 10 out of the mix.
Ingredients
For the jam
-
- 250g granulated sugar or preserving sugar
- 250g Raspberries – fresh or frozen (substitute for Strawberries if you prefer or select one of the recipes in the home preserve section)
For the scones
-
- 250g plain flour
- 3 tsp baking powder
- Pinch of salt
- 50g butter softened
- 25g caster sugar
- 150ml milk
To serve
-
- 1 tub of clotted cream - if you can't find any try making your own before you substitute, see variations
- 1 large pot of your favourite tea
- A selection of sandwiches and small cakes if you are really hungry!
- A friend to share it with!
You will also need
- a 5cm round fluted cutter,
- a baking tray
- a large saucepan
Method
Make the scones
- Preheat the oven to 220c
- Sift the flour, baking powder and salt into a bowl then sift again – this puts air into the mix
- Rub in the butter until the mix resembles fine breadcrumbs. NB keep a light touch here and lift the flour mix as you rub it.
- Stir in the sugar then add half the milk, stir until the mix forms a loose dough, add a little extra milk if needed.
- Turn the dough out onto a floured work surface and lightly knead to ensure the ingredients have mixed properly, be gentle and don’t overdo it.
- Pat the mix out to a circle at least 2cm deep, cut 6 – 8 scones, remixing the dough cuttings if necessary. If you have more than 8 your scones will not raise properly, less is more with scone dough.
- Brush the surface of each scone with a little of the leftover milk then bake for 10 – 12 mins
- Whilst the scones are cooking make your jam
Make the Jam
- Put the fruit and sugar in a large saucepan.
- Heat gently until the juice starts to run
- Bring to boiling point and simmer for 5 mins removing any scum that comes to the surface.
- Test the jam for setting by putting a spoonful on a cold saucer and putting it in the fridge for a minute. Run your finger through and if a skin has formed the jam is ready, if not boil for another 2 – 3 mins and test again.
- Pour the jam into a serving dish and allow to cool
To Serve
- Reheat the scones in the oven for a few mins
- Put the warmed scones onto a warm plate or in a basket covered with a clean tea towel
- Serve with the cooled jam, a pot of clotted cream and a pot of your favourite tea.
- Eat and enjoy!

Serving suggestions and variations
- If you can't find clotted cream - an English west country speciality then use extra thick double cream or whipped cream instead.
- Can't be bothered to make your own jam, we wont tell anyone!
- Try Raspberry jam instead of Strawberry
- If you like fruit scones add 150g of sultanas to the dry scone mix and serve warm with fresh butter
- For a savoury version omit the sugar, add 100g grated cheddar cheese and a teaspoon of mustard powder to the scone mix. Serve with butter, cream cheese and chutney
- Got no baking powder, substitute the plain flour for self-raising flour. It’s not traditional but it works just as well
- Scones freeze well so if you have spares put them in a plastic bag in the freezer
- 3 steps to a perfect scone as passed to me by scone making experts no longer with us;
- sift the flour twice
- keep the air in the mix by lifting as you rub in the butter
- keep the dough thick before you cut it out. You will get a good raise on your scone rather than a biscuit
- Always add the cream to the scone before the jam, unless you want to do it the other way around!
Acknowledgements
There are 2 ladies in my past who have inspired my scone making fundamentals Sue, who Imet whilst a volunteer for Age Concern and my mother in law Joan, who’s scones are legendary in the family. Thank you ladies, your secrets have been passed on to Simon who is now our scone expert!
You might also like to try one of the following from our collection to add to your creasm tea;
- Like cucumber, boiled egg and cress sandwiches are a classic, and if you want to then cut off the crusts, or go for an open egg and mayo sandwich!
- Savoury flans are great served in wedges. For a more delicate meal then make mini individual tarts with the filling of this Pea and pancetta flan.
- Another Bristish afternoon tea classic is a Victoria Sponge cake. Tarditionally just filled with strawberry jam but for something more interesting try some meringue butter cream.


We hope you have enjoyed these recipes
Happy eating!
Meringue Nests
 Meringue nests should be crunchy on the outside and chewy in the middle. They keep well so can be stored in an airtight container for an emergency dessert or eaten as they are as a simple snack. They have no gluten content so great for a sweet something for Coeliacs. Meringue is a versatile medium to work with so be adventurous and try adding flavours and food colours to entertain children.
Please note the main picture shows a plain nest filled with Chantilly Cream and thawed frozen summer berries - simple.
Link to measurement conversion chart
This recipe uses 2 egg whites and will make 8 good sized individual meringue nests or 2 large pavlova meringues.
Ingredients
- 2 egg whites
- 4 oz caster sugar – Note if you use unrefined sugar your meringue will have a golden colour once cooked, like the one in the picture, if you want white use refined caster sugar
You will also need
- 2 baking trays lined with baking parchment
- a large mixing bowl
- a hand or electric whisk
Method
- Preheat the oven to 150c,
- Put the egg whites into a large bowl. Using an electric mixer, beat the egg whites until stiff peaks form then slowly add the sugar, a tablespoon at a time, until the sugar has all been added and the whites have a stiff glossy texture.
- Using a tablespoon spoon out the meringue into 8 dollops on the 2 baking sheets, allow space for the meringue to spread.
- Spread the dollops into circles and press a dimple in the middle to form your nest.
- Put them in the oven and reduce the heat to 140c and bake for 30 mins.
- Turn off the oven and leave them to cool and dry out until the oven is totally cold, 4 hours to overnight.
- Serve with fresh fruit and whipped cream


Serving suggestions, variations, hints and tips
- If you want a fancy more professional looking nest load the meringue mix into a piping bag with a large start nozzle. Mark 8 x 10cm circles on the back of the parchment, 4 on each sheet, pipe the base of the nest in a spiral then pipe rosettes around the edge to form the nest. They taste no different but if you like to present them better for guests it is fun to do
- For a larger single pavlova Mark 1 x 30 cm circle or 2 x 20cm circles and pipe or spread the meringue as before.
- Any fruit will go with a meringue but berries work particularly well. If you have a bag of frozen berries serving them partially thawed on a hot day with meringue and Chantilly cream is fantastic.
- For a Peach melba just add some peach slices and drizzle over some raspberry coulis, serve with pouring or whipped cream
- For Eton Mess whip 5ml double cream with a dessert spoon of icing sugar and a few drops of vanilla essence, chop up some fresh strawberries, crumble up 2 or 3 meringue nests into large pieces and gently combine in a large serving dish. Drizzle over some strawberry sauce or coulis and serve.
- Meringue nests are equally nice served with ice cream. A dollop of ice cream in the nest and fruit or chocolate sauce or crumbled served with layers of ice cream and fruit as a sundae.
- For flavoured meringue treats add a little flavouring such as mint, vanilla, lavender, etc to the meringue mix then swirl through a few drops of an appropriate coloured food colouring before dividing up and baking the meringues.
- Make 16 small meringues and join the flat sides together with whipped cream and a little jam

Acknowledgements
I can only thank Delia Smith for inspiring my meringue nests. I have used her recipe for Petits Mont Blancs many times substituting the chestnut puree for fruit. Her Mascarpone topping is a wonderful substitute for cream and has an almost custardy taste about it. We love it. Thanks Delia.
Mascarpone topping recipe
-
- 250g Mascarpone
- 200ml Fromage Fraise
- 1 dessert spoon of caster sugar
- 1tsp Vanilla essence
Put the mascarpone in a bowl and loosen it by stirring with a spoon.
Add the remaining ingredients and combine.
Note - This topping keeps for a few days in the refrigerator.
If you have enjoyed this recipe, you might also like to try;
- A light Pea Soup makes a great main meal if you want a summer lunch to serve your meringues with.
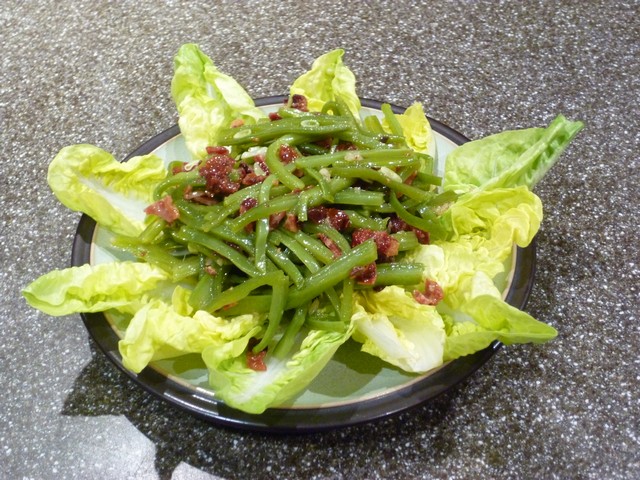
- looking for a side salad with a difference then check our our Runner Bean Salad when the beans are in season.
- It's never too early to get your mincemeat on the go, our Cranberry Mincemeat stores well and is a great favourite in the run up to Christmas.


We hope you have enjoyed these recipes
Happy eating!
Extra rich vanilla ice-cream
Making ice cream may seem like a lot of effort for something you can buy so easily however once you have tried it you will realise just how nice ice cream can be. It is, however, worth investing in an ice cream maker, otherwise you will need to tend your ice cream for a couple of hours whilst it freezes.
Link to measurement conversion chart
Ingredients
- 300ml single cream
- 1 vanilla pod
- 4 large egg yolks
- 100g caster sugar
- 300ml double cream
You will also need
- a saucepan
- a hand or electric whisk
- 1 x 1ltr freezer container
- optional - an Ice Cream machine
Method
- Heat the single cream with the vanilla pod until coming to the boil, remove from the heat and leave to infuse for 20 mins then remove the pod and either dry and store to use again or slice it open, remove the seeds and add them to the cream.
- Beat the egg yolks and sugar together until combined but not too frothy
- Reheat the single cream until almost boiling then pour over the egg mixture stirring to combine. Pour the custard into a clean saucepan and heat slowly, stirring continually, until the custard starts to thicken. Set aside to cool then chill for an hour.
- Lightly whip the double cream until thick and floppy then add to the cooled custard.
- If you have an ice cream machine, freeze churn until ready following the manufacturers instructions.
- If you do not have an ice cream machine pour the custard into a freezer container and put in the freezer. Remove from the freezer at 30 – 45 min intervals and stir to loosen the ice crystals then return to the freezer. Do this approx. 4 times until the mixture has gone thick then leave to freeze completely.
Serving suggestions and variations
- Homemade ice cream is not a soft scoop product. You will need to remove it from the freezer and either put it in the fridge to soften for 1 hour before use, or pop it in the microwave and give it 10 second zaps until it is soft or leave it at room temperature for 15 mins. The fridge option will give the better scoop consistency. Make sure you return any remaining ice cream to the freezer
- Miss out step 1, use 75g sugar and 1 tsp vanilla essence for a less rich and quicker version
- Serve with fruit or chocolate sauce
- Delicious served on waffles with pecans and maple syrup
- Great with warm chocolate brownies

Acknowledgements
I was not a big ice cream fan until we went to Italy and tried some fantastic ice cream. John then bought me an ice cream maker for Christmas and it became a really big hit. Our best experiment was Brandy Alexander Ice cream which was fantastic served with Apple pie but if you try making ice cream with alcohol in be aware that it melts really quickly! This recipe came from a book called “Cool Seductions” by Rosemary Moon. It contains some great ice cream and sorbet ideas.
If you have enjoyed this recipe you might also like to try one of the following:
- Ice cream uses loads of egg yolks, why not try our Raspberry Meringue Gateaux to use up your spare whites
- Another eggy favourite is a Frittata, give this Pea and Feta Frittata a try, great served with salad
- Looking for something more substantial then our Corned Beef Lasagne is a great variation on the classic and a must with our simple Garlic Bread


We hope you have enjoyed these recipes
Happy eating!
Oaty Apple Crumble
 In the autumn when apples are abundant apple crumble is one of the first dishes on the list, closely followed by apple pie! This recipe addsoats to the crumble giving it a slightly chewy texture that we all love. We hope you love it too.
Link to measurement conversion chart
Makes enough for 4 – 6 depending upon how big a portion you serve up
Ingredients
- 450g Bramley apples peeled and chopped
- 150g Soft brown sugar
- Pinch of cinnamon
- 75g Butter
- 100g plain flour
- 100g rolled oats
You will also need;
- 1 ovenproof baking dish or casserole
- a bowl to make the crumble in
- a bucket of custard
Method
- Preheat the oven to 180c
- Rub a little butter around the inside of the ovenproof bowl
- Mix the chopped apple with half the sugar and add to the ovenproof bowl
- In a large mixing bowl rub the butter, flour and oats together until the butter has been evenly distributed amongst the dry ingredients and there are no lumps.
- Stir in the remaining sugar then sprinkle over the chopped apple
- Bake for 40 mins until the crumble is golden
- Allow to cool slightly then serve
Serving suggestions and variations
- Crumble in my mind should be served with a good amount of custard. Simon disagrees, he thinks Yogurt, John prefers double cream and Grandad is only happy with Ice-cream. Each to their own!
- Try adding a few sultanas, or blackberries, or raspberries, or blackcurrants, or gooseberries or……whatever you have to hand. You may need to adjust the sugar level depending upon the berries being added
- We love extra crumble on ours and therefore use more crumble ingredients than listed, if you increase the quantity, keep the proportion the same
- If you don’t want oats substitute plain flour and you will have a normal crumble
Acknowledgements
The original recipe comes from my Mother In Law, who melted the butter and stirred it into the dry ingredients so you got clusters. But she used a higher fat ratio so we reduced it to the recipe you have here. Now we rarely have crumble without oats. Thank you Joan.
If you enjoyed this recipe, you might also like to try:
- The velvety texture of Aspargus Soup is well worth an investment in fresh spears to make, if you don't grow your own.
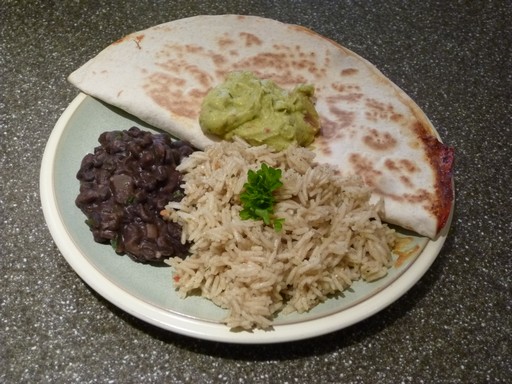
- For a tasty snack or light lunch try Quasadilla, for a more substantial meal add a portion of Black Beans Park City Style and a spoon of rice - yummy.
- When you have a few eggs to spare have a go at making a traditional snack of Pickled Eggs, you will soon be making more.


We hope you have enjoyed these recipes
Happy eating!
Profiteroles with chocolate sauce
 This recipe for profiteroles in chocolate sauce varies from a standard profiterole recipe because they are filled with ice cream instead of whipped cream. It can easily be adapted to be served with a fruit based sauce which makes a less rich dessert. Profiteroles freeze well if frozen un-filled. So if this recipe makes more than you need put them in a bag and freeze for a quick desert at another time. The chocolate sauce is very quick to make and can be used for any other dessert needing a chocolate sauce.
Link to measurement conversion chart
Ingredients
- 300ml water
- 75g butter
- 150g plain flour
- 5 large eggs, beaten
- 150g plain chocolate
- 100ml double cream
- 30g sugar
- 1 tub vanilla Ice cream - homemade if you have any
You will also need
- Piping bag with a large plain nozzle
- 2 Baking sheets greased
- a saucepan
- a wooden spoon or hand held mixer with a beater attachment
Method
Preheat your oven to 220c
To make the choux pastry bring the water to boil then add the butter and a pinch of salt, heat until the butter melts. Remove the pan from the heat then gradually beat in the flour, the paste will dry out in the heat of the pan, this is fine. Using a wooden spoon or hand mixer, slowly beat in the eggs a little at a time, Slowly is very important as if you add the eggs too quickly the pastry will be runny and no use. Do not add more flour if this happens, you will have to start again. The pastry should have the appearance of a thick paste once done. Put the paste into a piping bag and you are ready to make your profitteroles
- Make your Choux pastry
- Pipe 12 – 16 balls of pastry onto each baking sheet allowing plenty of room for them to spread
- Bake in the oven for 10 mins then reduce the oven temperature to 180c, and cook for a further 20 mins
- Remove from the oven and switch off the heat. Pierce all the profiteroles so the steam can escape, then put them back in the oven with the door open for 10 mins to help them crisp up.
- When ready to serve melt the chocolate and sugar together then add the cream
- Slice the bottom off each profiterole and then fill with a scoop of ice cream. For each serving, arrange 4 profiteroles on a plate and pour over some of the sauce
Serving suggestions and variations
- If you don’t want to assemble just before you eat them, fill with ice cream and freeze in advance, remove from the freezer approx. 10 mins before serving, nb the profiteroles may go a little soft.
- Use a raspberry coulis instead of chocolate sauce
- Fill with whipped cream instead of ice cream, best if you want to prepare ahead
- Use a chocolate ice cream instead of vanilla
- Fill the profiteroles with a savoury filling and cheese or white sauce for a savoury starter
- Make larger choux buns and use 1 per serving instead of 4, slice the bun in half rather than filling from the bottom
- Use slightly less cream to make a thicker chocolate sauce
Acknowledgements
I used this recipe the very first time I made profiteroles and they worked out perfectly. The original batch wer apreciated so much by the firends that ate them they took the spare ones home!I then tried other recipes and failed miserably so went back to this one and have used it ever since. It comes from a recipe book called “A taste of France” by Frederic Lebain and Jean Paul Paireault.
If you have enjoyed this recipe you might also like to try one of the following:
- When you have guests to impress why not offer them Scrambled eggs with Smoked Salmon or Trout for a richer breakfast dish
- An omelette makes a tasty lunch but a Souffled Omlette goes a step further and is delicious
- We love Tiramisu, and you can't beat this Black Forest version with extra "Misu".


We hope you have enjoyed these recipes
Happy eating!
Pasteis De Nata
Pasteis de Nata are something I came across watching Micheal Portillo travelling across Portugal by train on the TV. As a huge custard tart fan, custard is one of my favouritest things, I was intrigued to find out what the difference was. We did some research, a taste test and decided that they were pretty good. It turns out they are also a good way of using up egg yolks. The custard is slightly thicker texture to the UK version and involves puff pastry instead of shortcrust. The real difference comes down to whether you are a nutmeg fan or not! If you are gluten free substitute the puff pastry for Gluten free shortcrust instead.
Link to measurement conversion chart
Ingredients
- 1 large egg
- 2 large egg yolks
- 115g caster sugar
- 2 tbsp cornflour
- 300ml full fat milk
- 1 tsp vanilla bean essence or 2 tsp vanilla essence
- 2 x 375g packs of ready rolled puff pastry or the equivalent of gluten free shortcrust
You will also need
- 2 x 12 hole bun tins or make 2 batches if you only have 1 tin.
- 2 x small saucepans, or 1 washed up between uses
- a mixing bowl or jug
Method
- Pre heat the oven to 180c
- Heat the milk in a milk pan until hot but not boiling
- Put the egg, yolks, sugar, vanilla and cornflour in a large jug then whisk to combine.
- Gradually add the milk to the eggy mixture and whisk until smooth, transfer to a clean saucepan
- Heat, stirring, over a medium heat until the mixture thickens, do not boil.
- Transfer the custard to a bowl, cover with cling film and allow to cool.
- Place one sheet of pastry on top of the other then roll tightly on the long end to form a swiss roll effect then cut into 24 even sized discs
- Flatten the discs with a rolling pin until they are the right size to fit the bun tin, approx. 10 cm round.
- Fill each pastry round with a teaspoon of custard then bake for 20 – 25 minutes until the pastry is golden and crisp. The custard may start to take on a deep brown colour on top and rise, it will sink again once cooled
- Eat whilst warm if possible and enjoy!


Serving suggestions and variations
- These little pastries are best served warm the same day. If storing it is best to pop them bac in a warm oven for 10 mins before you serve them
- Try adding a few berries or jam to the tarts before you add the custard
- Sprinkle the tops with a little cinnamon or nutmeg before you bake
- Don’t like puff pastry then try shortcrust instead but avoid the extra rich pastry as it is too crumbly for custard tarts
- NB, do not overfill with custard, they will boil over – a waste of good custard
Acknowledgements
We tried a number of variations, some use more egg yolks, we found this version on BBC Good Food to be the best. Having watched the program and seen the pastry rolled into spirals and pressed out by hand, this was the only recipe to attempt to replicate the process. If you just cut discs from the flat sheet of puff pastry the pastry case swells up and pushes all the custard out. That is a serious waste. Although he didn’t give me the recipe I thank Micheal Portillo for showing me the way.
Here are some more recipes you might like from our collection;
- If making Pasteis De Nata will leave you a couple of egg whites have a go at our Very Berry Meringue Nests,
- if you like a filling burger with a difference then the Great Australian Burger with the lot is for you,
- Love asparagus then try our Asparagus Flan.


We hope you have enjoyed these recipes
Happy eating!
Victoria Sandwich Cake
Once you have grasped the basics of cooking a Victoria sandwich cake it is a breeze to diversify and come up with a great deal of variety, in flavour and decoration, to suit any occasion, see the cake gallery for some of my adaptations.
Generally most recipes use a three egg mix however when you have a glut of eggs using 4 eggs is a great way of using up an extra egg and your cake will look really impressive. The extra height you get with a 4 egg mix means that it is easier to slice your sponges in half horizontally to make a multi layered sponge cake instead of a simple sandwich cake. At this point you are well on the way to a simple gateaux! Yummy.
Whilst I will give you the measurements for your ingredients in reality I weight my eggs and match the weight of my ingredients to this. After all baking is a chemistry lesson in action and getting the proportions right with your ingredients is quite important. With a Victoria sandwich the proportions are 1:1 by weight so as eggs come in different sizes it makes sense to weigh them. In this instance measurements are imperial as I remember them easier.
Link to measurement conversion chart
Ingredients
- 4 eggs at room temperature
- 8oz Self raising or sponge flour
- 8oz caster sugar
- 8oz butter at room temperature
- A dash of vanilla essence
- Strawberry jam
- Optional - whipped cream or vanilla buttercream
You will also need
- a mixing bowl
- a hand or electric whisk
- 2 x 8 inch, or 20cm, sandwich tins
Method
This is an all in one method, it is quick and easy.
- Pre heat your oven to 180c, grease and line 2 x 8 inch, or 20cm, sandwich tins
- Put all the ingredients except the jam in a large mixing bowl and using an electric mixer beat them together until combined, they should look pale yellow and fluffy, takes about 3 mins
- Divide the mixture between the 2 tins
- Bake in the oven for 20 – 25 mins. Let your nose be your guide, when the litchen smells nicely of cooked cake the cake is cooked!
- Remove from the oven and leave to cool in the tins for a couple of mins.
- Turn the sponges onto a wire cooling rack and leave to cool completely.
- Sandwich the two cakes together with a good helping of strawberry jam and sprinkle the top with a dusting of icing sugar. Sandwich cream or buttercream as well as jam if you like but a real classic Victoria sandwich has only jam.
- Share with a good friend and a cup of tea.
Hints and tips
- Do not open the oven until the cake smells cooked. Once you start to smell cooked cake open the door slightly and check that the top of the cakes look evenly brown, press the top and they should spring back. If they look pale don’t touch them, shut the oven and give them a couple more mins.
- If you open the oven too early you risk the cake slumping in the middle. You cannot recover the cake once this happens. However on the bright side you can still eat it. Fill the dip with whipped cream and fresh fruit then serve as a dessert. The great thing is you will have 2 desserts!
- If the cake over cooks, but is not burnt, make up some butter cream and cover the outside to disguise the colour.
- Chickens love burnt cake!
- For a lighter sponge you need to revert to mixing the ingredients together in the traditional way. I am happy with the quick route.
- Sponges freeze well if unfilled. Wrap them in cling film and put them in a freezer bag. When needed defrost and fill, takes about 20 mins
- I think a sandwich cake has a better texture the next day, the boys just like cake!
- Store in an airtight container and the cake should keep well for up to a week.
- You need 2oz of ingredient per egg, so if you want a 2 egg cake reduce accordingly.
- For a 2 egg cake use 7 inch tins, for a 3 or 4 egg cake use 8 inch tins. If you want to venture into larger sponges increase the tin size by an inch every 2 eggs. The larges I have seen is a 16 egg cake and it was enormous.
Alternatives
For a different flavoured sponge cake omit the vanilla essence and substitute
- 1 oz cocoa powder, mixed with a little warn water, for 1oz of flour and add 1/4 tsp of baking powder for a chocolate sponge
- 2tblsp coffee essence or expresso for a coffee sponge
- 1 oz cocoa powder, mixed with a little warn water, for 1oz of flour, add 1/4 tsp of baking powder and 1tblsp of coffee essence or expresso for a mocca sponge
- grated zest and the juice of a lemon for a lemon sponge
- grated zest and the juice of an orange for an orange sponge
- 1oz of ground almonds and a tsp or almond essence for an almond sponge
- 1 mashed banana for a banana sponge - goes well with whipped cream and melted toffee's drizzled over
Fillings and toppings
- Flavoured butter cream or meringue butter cream
- water icing flavoured with fruit juice,
- fruit curds and other flavoured jams,
- Whipped cream or Chantilly cream
- Fresh fruit, nuts, bonbons and any number of a huge range of commercially available cake decorations.
Be inventive
Take inspiration from The Cake Gallery below. Check back regularly as I add more pictures as I make more cakes. The decoration and flavour might change but the basic cake recipe doesn't.
Acknowledgements
I made my first Victoria sandwich at school and had no hand mixer, I had to beat the thing with a wooden spoon, adding the eggs and a little at a time then folding in the flour. It’s the only time I have done it that way and my arm aches thinking about it. However I do occasionally follow the old fashioned method using a hand mixer if I feel like it. It doesn’t take that much longer and you do get a lighter sponge. However these days it only really happens if I am putting a cake in the show. Before I learnt the recipe by heart my usual point of reference was the Dairy Cook Book, a tatty, well read book that I still refer to on a regular basis. Thanks to Clare for buying it for me all those years ago.
If you have found this section helpful and want to give us feedback or show us some photo’s of your own cakes we would love to hear from you. Why not put a photo on our facebook page.
Happy cake making!
The Cake Gallery


Raspberry meringue gateaux
This recipe makes a wonderful light but rich dessert for a special meal. Best eaten the same day but even better made a few hours ahead and allowed to stand. This gateaux can be made over a few days as the meringue element can be stored in an airtight tin and the gateaux assembled on the day needed. It is a more advanced recipe for a confident cook.
Link to measurement conversion chart
This recipe uses 4 egg whites and will serve 6 – 8 people depending upon how generous you want to be.
Ingredients
Cake
- 4 egg whites
- 185g Caster sugar
- 250g Plain flour
Filling and Topping
- 15 floz Double or whipping cream
- 3tsp Framboise
- 250g fresh raspberries, saving a few for decoration
- A few drops of red food colour – optional
You will also need
- 2x 20cm loose bottomed cake tins. If you have 4 you can bake in 1 batch otherwise you will need to bake in 2 batches
- A large mixing bowl
- a hand or electric whisk
- a piping bag and star nozzel for decorating
Method
Make the meringue layers
- Preheat the oven to 160c, grease and line the base and sides of the baking tins
- Put the egg whites into a large bowl. Using an electric mixer, beat the egg whites until stiff peaks form then slowly add the sugar, a tablespoon at a time, until the sugar has all been added and the whites have a stiff glossy texture.
- Gently fold in the flour until just combined
- Divide the mixture into 4 equal parts and put a quarter into each of the tins available, spread the mix evenly in the tin and smooth the top. If cooking in 2 batches put the remaining meringue in the refrigerator until the first batch has cooked
- Bake for 25 mins. until golden light and crisp. Remove from the oven and leave to stand for a few minutes before removing the meringue from the tin
- If cooking in 2 batches repeat step 5 with the remaining uncooked meringue portions. At this stage the meringues can be stored in an airtight tin for several days.
Make the topping and filling
- Whip the cream until starting to stiffen
- Add the Framboise and beat until combined. NB do not over whip the cream as it will continue to stiffen when you stop.
- Swirl a few drops of pink food colour through the cream
Assemble the gateaux
- Layer the meringue with the cream and a sprinkle of raspberries
- Spread half the remaining cream over the sides and top of the gateaux
- Pipe the remaining cream over the top and decorate with the remaining raspberries. For a definitive red swirl in your piping brush a stripe of food colouring in the piping bag before filling it with cream.


Serving suggestions, variations, hints and tips
- This gateaux is a great one impress your friends. As it benefits from being left a few hours before being served once assembled it is a good BBQ or dinner party dessert and needs no accompaniment
- Substitute the Raspberries for strawberries, blackcurrants, blueberries or blackberries. Replace the Framboise with suitably flavoured liquor such as Casis, Strawberry Liquor, Blueberry liquor or Blackberry Liquor
- Berry flavoured liquors are easy to make so have a go when the different fruit seasons hit. They are full of flavour and keep well for many years improving with flavour as they go. They also make great Christmas gifts.
- For a mint choc meringue gateaux, stir chocolate chips into the meringue, add Crème de Menthe to the cream and use a splash of green food colour instead of red
- For a citrus version add the zest of 1 orange or 2 lemons or 2 limes to the meringue and use a suitably flavoured liquor in the cream consider Cointreau or Limoncello. Use a splash of orange yellow or green food colour instead of red.


Acknowledgements
The original version of this gateaux, Coffee and hazelnut meringue gateaux, came from an Australian Women’s Weekly recipe. I tested it out as an alternative to sponge cake for a Farmers Market. Coffee and nuts are not a favourite of Simon’s so I substituted raspberries and played with the recipe until we got this one. Fabtastic.
If you enjoyed this recipe you may also enjoy:
- Our Meringue Buttercream makes a great substitution for whipped cream in this dessert
- Another great meringue dessert is Louise's Lemon Meringue Pie, a family favourite
- Great for using up stale hot cross buns or tea cakes our Hot Cross Bread and Butter Pudding can be made all year round


We hope you have enjoyed these recipes
Happy eating!
SImple Mint-Choc Mousse
 This recipe for Mint-Choc Mousse is very simple and quick to put together. We love chocolate mousse but most of the recipes we have are rich, solid and sweet. This one is light and fluffy, very similar to the ones you buy in a supermarket but with the preservatives missing. It has very little fat in it too so would be a good sweet treat for those on a diet. It can be increased in volume easily so if you need to make for a larger number of portions increase by one egg white and 25g chocolate per person. Try to avoid chocolate with bits in or a cream filling.
Makes enough for 4 portions
Link to measurement conversion chart
Ingredients
- 100g Mint flavoured dark chocolate, such as “Lindt Dark Mint Intense”, chopped
- 3 Large egg whites
- 1 tbsp caster sugar
- 150ml double cream whipped – optional
You will also need
- 4 ramekins or White wine glasses
- A heat proof mixing bowl
- a mxing bowl
- a hand or electric whisk
Method
- Set aside a teaspoon of chopped chocolate, melt the remaining chocolate in a bowl in a microwave, or over a saucepan of simmering water, and allow to cool slightly
- Whisk the egg whites until they form soft peaks
- Add the sugar to the whipped egg whites and beat until combined.
- Fold in the melted chocolate until evenly distributed.
- Evenly distribute between the serving dishes
- If desired pipe the top with a little whipped cream
- Sprinkle the top with the reserved chocolate to decorate.
- Refrigerate until needed, at least 20 mins


Serving suggestions and variations
- For a bit of extra decoration top off with a spring of fresh mint
- If you don't like mint, use plain unflavoured chocolate then incorporate 25g of chopped white chocolate and crushed cardamom seeds.
- Try other flavoured chocolate such as orange, salted caramel or ginger.
- For a small party dessert try piping the mousse into shot glasses, it makes a little go a long way.
- Want to make it more adult use plain chocolate and try adding a little of your favourite liquor, rum or brandy.
- Instead of topping with whipped cream, pour a little double cream on top and sprinkle some cocoa powder over.
- For a bit of extra decoration top off with a spring of fresh mint

Acknowledgements
The original recipe came from BBC good food magazine. The original recipe used plain unflavoured chocolate and incorporated 25g of chopped white chocolate and crushed cardamom seeds but we weren’t keen on the texture or flavour. However with a little experimenting the Mint Choc version gets a big thumbs up from us and our friends.
You might also like to try these recipes from our collection;
- For an easy prepare ahead sharing starter Tony's Prawny eggs a perfect solution,
- A Traditional English Cream Tea is a lovely treat at any time of the year
- for using up a few of those extra egg yolks try our extra rich Vanilla Ice-cream.


We hope you have enjoyed these recipes
Happy eating!